

This submit originally appeared on CheckingInWithChelsea.com.
Impressed by at present trending raffia-protected home furnishings, I’m showing you how to create your very own Tv console desk covered in wallpaper for $150!
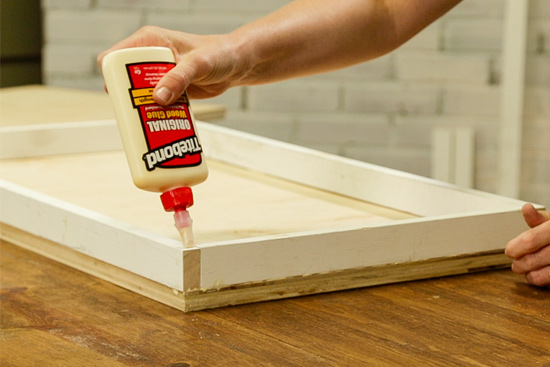
**I partnered with Titebond for this project which will make me definitely psyched because…I utilised their initial wooden glue and ONLY their wood glue to maintain my total table collectively! What?!**
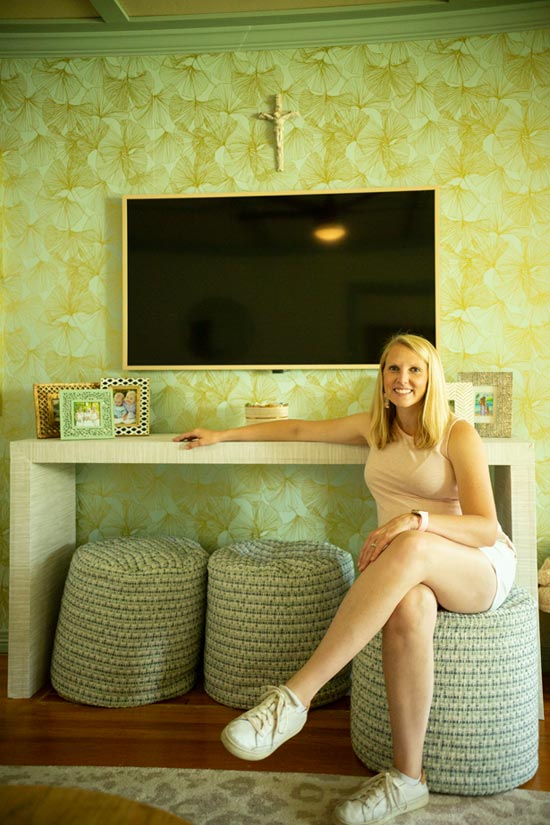
The aim for my dwelling was a tall and large desk without having any noticeable supports that broke up the clean lines. The general dimensions of my concluded desk are 70″ broad and 35″ tall. So continue to keep that in intellect with the elements and lower lists below!
What to Invest in
What to Reduce
1x2s:
- (4) @ 32″
- (7) @ 14-1/2″
- (2) @ 70″
3/4″ plywood:
- (4) 32″ prolonged x 16″ wide
- (2) 70″ lengthy x 16″ wide
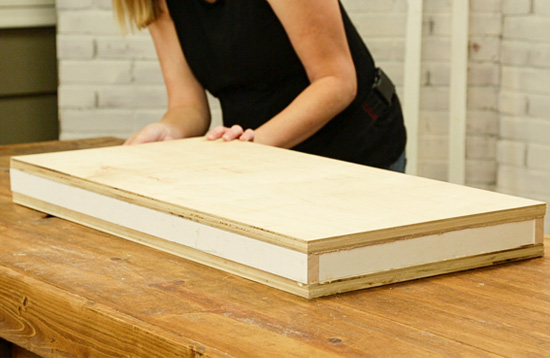
Creating the Console Desk Boxes
Primarily we are producing 3 separate bins. 2 will be the legs and 1 will be the tabletop.
Commence with the 2 more compact containers (legs) to get your toes soaked. Lay a 32″ piece of plywood down and incorporate your Titebond wood glue along the prime facet of all 4 edges. Then lay a 1×2 on its aspect on major of the glue, making guaranteed it is flush with the edge of the plywood.
The 32″ items of 1×2 will go from edge to edge of the plywood although the 14.5″ pieces should in shape snuggly between.
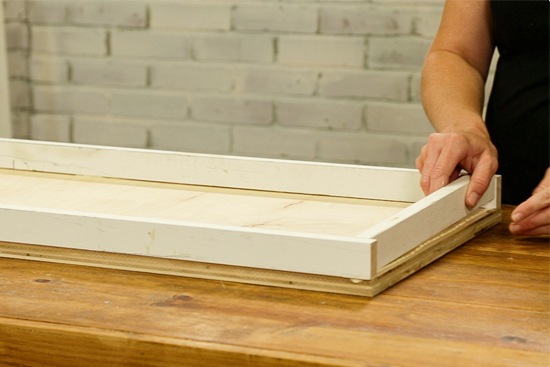
At the time you have the 1x2s lined up on the edges just so, run a bead of wood glue on the best of them.
Gently set an additional 32″ piece of plywood on top rated. Now your box leg is full!
Repeat for the other leg, applying a several clamps if essential to make tremendous tight joints!
You are going to comply with the exact same techniques to create the tabletop, only you will increase an extra 14.5″ 1×2 assist somewhere in the center. This will assistance continue to keep the lengthy 1x2s from sinking in and include overall stability to the table.
Waiting around is the Hardest Part
If you have at any time tried out to pry wood aside which is been glued with Titebond, even for a handful of minutes, you know it’s in essence unattainable to do perfectly.
And which is why you do not need to have any nails or screws to hold your table together. Wooden glue, when completely dried and treated, is really stronger than fasteners! So ridiculous but oh so real!
Let your 3 containers dry and set up for at minimum 30 minutes right before relocating on to the up coming action.
Including Legs to the Desk Top rated
Assuming your floor is amount, set your leg packing containers upright, somewhere around 70″ aside. Apply sufficient quantities of wood glue to the tippy leading of your legs and gently set the tabletop in position. Modify the prime so it’s flush with the outside the house of your leg on a person side right before altering the other leg.
For a table this big, it would be beneficial to have a friend or partner hold the great side in place although you manipulate the other aspect. But with a several back-and-forths, you can tackle it by yourself way too!
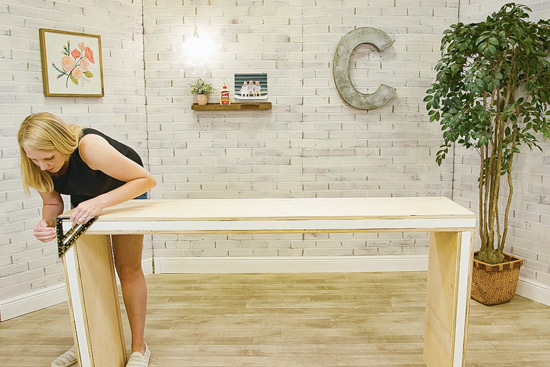
I employed a speed square to make confident the legs ended up at 90-diploma angles. Not a bad tool to have in your arsenal if you really don’t have a single previously!
When you’re pleased with your leg circumstance, enable it sit for about 30 minutes just before you start out masking every thing in wallpaper!
Adhering Wallpaper to the Console Table
I appreciate the texture of a raffia or light-colored wooden table. And just after a buddy shared an inexpensive peel-and-adhere wallpaper she utilised that looked like fake grasscloth, I knew I could use that to generate the texture I needed for this piece of home furnishings.
I also wished the desk to appear like a person slab of wood. To make that influence with the wallpaper, I commenced at the base of 1 leg, took it up and over the top, and then down the other leg without any cuts or seams. I also lined it up with the back edge of the table so it could fold and go down the entrance edge with out any seams.
Ideally, the video clip better illustrates how I managed the corners, so enjoy it over! I experienced the paper that arrived from the tabletop less than the paper from the legs. Then I scored on the paper itself the 45-diploma angle from the inside of corner to the exterior corner of the wooden construction. I slice any surplus paper from the leading and then caught it down. Upcoming, I slice the layer of paper coming from the legs along the line I just scored. So when almost everything was laid flat and caught down very good, it appears to be like my legs and tabletop were being mitered together.
At first I prepared to carefully trim the excessive at the finish of the entrance edge, but due to the fact it folded so properly without having any effervescent, I folded the inch or so surplus and caught it to the within of the desk.
And that got protected up subsequent with another run of wallpaper. I bought adequate wallpaper (2 rolls) to deal with the within of the legs and the underside of the tabletop. And given that I was less involved on the underside about viewing seams, I coated them independently and ended up not covering the underside of the tabletop by itself. You really just cannot see it all through each day use and it saved me $27 by not opening the 2nd roll.🤷♀️
Oh and for the legs, the inside of wallpaper was flush with the entrance edge so the surplus was just folded over and stuck on to the again of the legs. Of course, it appears to be unfinished from the bottom. BUT WHO CARES?!

The only spot I wanted to trim wallpaper was at the foundation of the legs. I propped up one particular leg at a time with a scrap piece of 1×2 so I could trim it as specifically as attainable. I did not want any sliver of wooden exhibiting and offering absent my table’s insider secrets!
About an hour or so soon after finishing the desk, there was nonetheless a minimal wobble to it if you shifted it from facet to side. But after leaving it alone right away, the wiggle was absent and this table was strong, stable and all set to shift to its new residence!
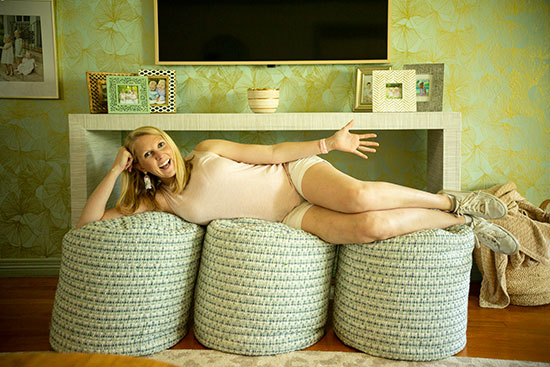
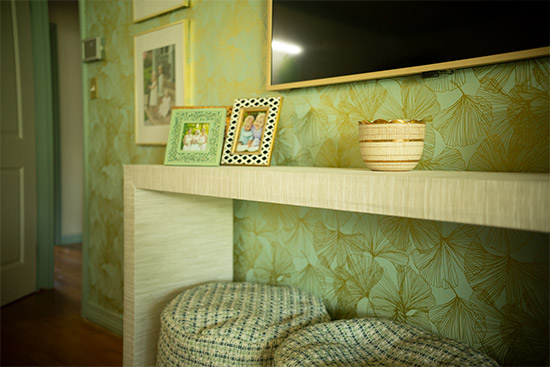
I ordered our poufs from Household Depot* to provide as decoration AND further seating. They are like sophisticated beanbag chairs and the little ones have already pulled them out to sit and roll all-around numerous instances!
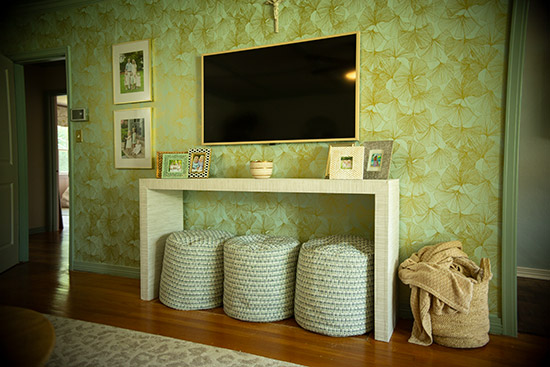
The wallpaper powering the Tv and console was lately hung to create an accent wall. I like it by by itself but I’m however making an attempt to figure out if I like the area as a complete with the wallpaper in it.🤔
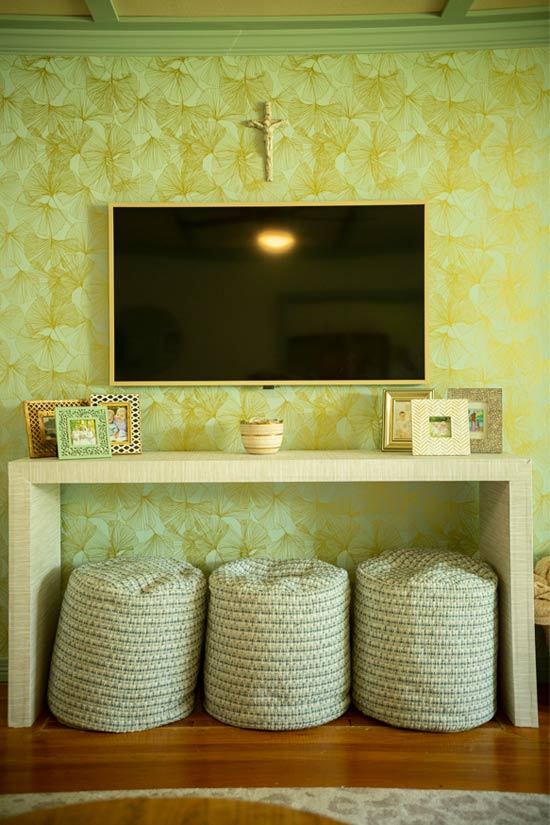
But we do like the sleekness of our Frame Tv set*! It was a splurge we taken care of ourselves to when our former dwelling sold for way around the inquiring price. Now I’m thinking I could possibly brush some gold paint on the frame to match other gold frames in the place. The jobs and tips never quit all over below! Ha!
*This post incorporates affiliate backlinks.*